So you want to know how to start painting miniatures, like Warhammer 40k miniatures, but don’t know where to start. I completely understand. It was not that long ago I was in the exact same situation. Don’t misunderstand, there are tons of articles and videos out there on exactly how to paint a specific miniature or type of miniature, but I never found one that really started at the beginning.
Do I need a specific type of brush? What is this thing I see miniatures attached to for holding while painting? How do I attach the miniature to whatever that thing is? Is there a best type of miniature to start painting? What else do I need to have in order to assemble and paint the miniatures? These are just a few of the many questions I will tackle when I explain how to start painting miniatures.
In my examples, I will be working with Warhammer 40k miniatures as these are some of the most popular, and honestly, they are what I am the most interested in. Getting started painting miniatures really doesn’t vary much with the types of miniatures you want to paint, they all have a lot in common, particularly when you are just starting out.
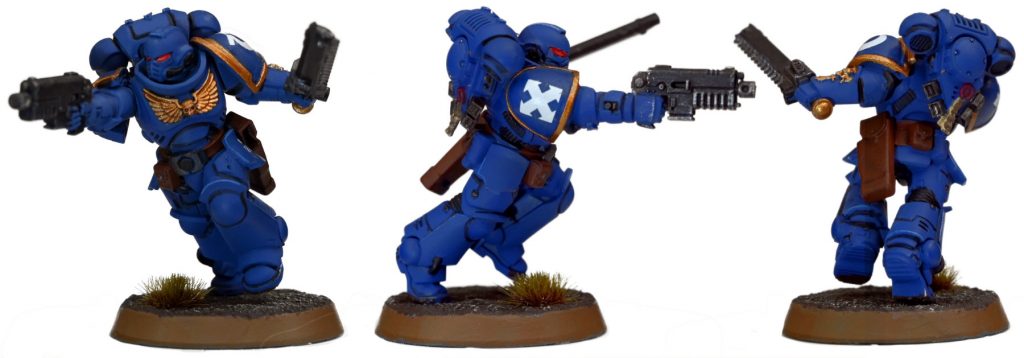
The image above is the absolute first miniature I have ever painted, and the first model I have painted in probably almost 40 years. I should also note that I was not very good way back then, although I did enjoy it. While the model pictured here is not particularly great, it is, in my opinion, pretty solid as a first attempt. It shows a little edge highlighting, and a little dry brushing, as well as a few other techniques I watched in some videos. It really looks better in person.
Getting the right miniatures to start with
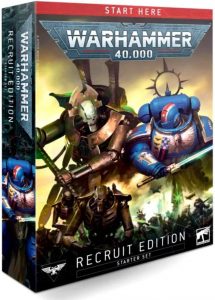
In the Warhammer 40k arena there are some specific kits made for beginners, and these are a fantastic place to start. I really like the Warhammer 40,000: Recruit Edition as it has everything you need to assemble two different types of miniatures (Space Marines and Necron warriors) with several of each, and everything you need to actually start playing the game as well. It is probably one of the most inexpensive ways to get into the Warhammer 40k universe.
One of the really nice things about these kits is they contain very detailed instructions on assembling the miniatures and even some nice painting tips. Unlike other models, you may have assembled before these are not cryptic black-and-white sheets of paper in what may, or may not pass for English. These have beautiful, full-color, glossy paper assembly guides that are just wonderful.
The part of this that gets a lot of people is they buy a more advanced kit first because they love the miniatures that are in it. That can be a serious problem as those kits are not usually aimed at the beginner and so they are more complicated and have less thorough instructions. They also do not include everything you need to get started with the game. The exception to that are kits like the Warhammer 40,000 Command Edition Starter Box which is basically the same as the Recruit Edition, with a whole lot more stuff in the box.
While the Command Edition is nice, it is a little overkill unless you know for certain you will be playing the game seriously.
Getting the right tools for the job
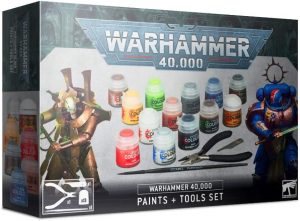
Like any hobby, you will need some tools, and this seems easy as well, just pick up the Games Workshop Warhammer 40,000 Paints and Tools Set Box and call it done, right? Not so fast.
I love the kit, I really do, and I recommend you start with it, but it is far from what you will need to really start painting miniatures in Warhammer 40k.
In the kit are some clippers, a mould line remover, and a paintbrush along with 13 Citadel paints which will work reasonably well at painting your miniatures. I say reasonably well because the paints are good, but there is nowhere near enough to complete any painting tutorial you find online, including the ones by the manufacturer.
Let me make this a little clearer. Games Workshop makes the Warhammer 40k Recruit Edition miniature kit I recommended earlier, they also make this paints and tools set, and they also make videos on how to paint the miniatures that come in the Recruit Edition kit. Unfortunately, the paints they use in the video include not only the paints in this paints and tools set but quite a few more as well.
This frustrates a lot of people starting out as they sit down with their Games Workshop miniatures, Games Workshop paint set, and turn on the Games Workshop video on how to paint the miniatures, only to find out that they need twice as many paints as came in the kit. ARG!
So why bother to get the paint and tools set at all? Because it is an excellent value for paints you will need anyway. You get 12 paints that usually go for between $4 and $5 per bottle which would be $48 in just paint. The Games Workshop Warhammer 40,000 Paints and Tools Set Box is currently on Amazon for $38.25 so that means the paint is discounted and the tools are free. Nice.
Additional paints for the starter kits
The paints and tools set comes with Abbadon Black, Corax White, Retributor Armor, Macragge Blue, Averland Sunset, Mephiston Red, Leadbelcher, Runefang Steel, Astrogranite, Tesseract Glow, Bugmans Glow, and Agrax Earthshade. This is an excellent start, but if you are going to use the Games Workshop videos to paint your miniatures (and you should), you will need a few more.
The Ultramarines in the kit really should start with a spray like the official video says, and yes, they make a can of spray paint specifically for that, Citadel Spray Primer Macragge Blue. Then you will need Corvus Black, Basilicanum Grey, Reikland Fleshshade Gloss, Mournfang Brown, and Spiritstone Red which you can get with this custom assortment. That is just for the basic Ultramarine, other colors will be needed for other miniatures or variations.
I highly recommend starting out painting your Warhammer 40k miniatures using the Games Workshop miniatures, paints (Citidel brand), and videos. This all works seamlessly and is designed for beginners. There are lots of other painting videos online that are fantastic, but they are not always as beginner-friendly and often mix-and-match paint brands which I find can be a little confusing when you are just getting started with miniatures. There is plenty of time to branch out later after you are comfortable with the basics.
If you are planning on doing miniatures other than Warhammer 40k, the same procedure works. Watch the video you want to use to paint the miniature (preferably from the miniature manufacturer) and get the paints listed in the video.
Other tools to add to your kit
While I absolutely think you should start with the toolset from Games Workshop if doing Warhammer 40k, there are some things you should add to help make your hobby easier.
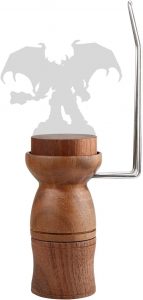
The first thing that really helped me was a paint handle. I went with the Jucoci 2-in-1 Painting Handle for Miniatures as it allowed me to have a short one, a taller one, and a hand brace all in one product. I really do not use it as a short handle, preferring to always have the extension on it. The real benefit to this as opposed to the one made by Games Workshop is the hand brace. I find this is a tremendous help in painting small details and have no idea how people do without it.
Please note that I am not knocking the Games Workshop Citadel Painting Handle, I just really like the fact that the Jucoci version has the little metal hand brace.
The next item you really should have is a file set and I like the TAM74104 Tamiya Tools – Basic File Set. Once you cut the pieces off the tree for your miniature, then remove as much plastic at the attachment point as you can with your snips, you need to carefully file down any remaining fragments that connected the part to the tree. A file is how you do this and you will have a hard time finding someone who knows more about tools for model building than Tamiya.
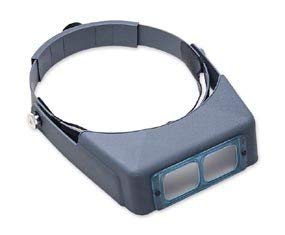
One other thing I could not live without is a magnifying headset. The best out there for the money is the Optivisor and they come in a wide variety of magnifications. For me, and this is very personal, I like the Optivisor #10 3 1/2x at 4″. There are cheaper, but when you are straining to paint the snap on the pistol holster of an Ultramarine, having blurry magnification is going to be a problem. Note that these come in different magnifications so you may need to get one that suits you.
I should also point out that I find it easier to use one of these than a magnifying glass on a stand, or built into a light because I can simply tilt my head slightly to look through them, and tilt it back to look under them, all without having to move the miniature. Since I tend to brace my arm on my desk to make the miniature more stable, this really helps.
When you are trimming parts off, or cutting out decals, you will eventually need two other things: a hobby knife and a small cutting pad. If you do not have a hobby knife I highly recommend you start with a small set like the X-Acto Basic Knife Chest which comes with three handles and a nice assortment of blades. X-Acto has been doing this for a very long time and makes an excellent product that is balanced between price and quality. There are cheaper, and there are better, but you will be very hard-pressed to find a better value in a quality product.

As for a cutting mat, with miniatures you don’t need anything big, so a small one like the OLFA 6″ x 8″ Self Healing Rotary Cutting Mat is an excellent choice.
To glue or not to glue, that is the question
Many of the miniatures for Warhammer, particularly the ones in the starter sets, do not require glue to assemble. I emphasized the word require because you may be able to assemble them without glue, but parts will tend to move and fall off while handling them or even while painting them. That can be a problem!
I like to glue all my parts after careful assembly to make sure they fit correctly. There are a few paths for gluing the model with the main ones being; a type of super glue, plastic melting glue, and regular glue. There are pros and cons to each.
Super glue, or CA (cyanoacrylate) is a type of anaerobic glue (it hardens when the air is removed such as a tight fit or squeezing two parts together) that sets very quickly. This is really helpful in that within seconds of pressing the parts together, they form a permanent bond. You do not have to rubber band them together and let them dry for hours or find some way to clamp them. This also allows you to use a very small amount of glue to hold parts together.
The con to super glue is the same as the pro, you put the pieces together and they are permanently bonded together almost instantly, with no time to adjust. If you really wanted that arm a little lower, too bad. Put the wrong head on the miniature, then get out a knife. If your body parts align just a little crooked, get out the file and filler. It can be devastating to ruin a miniature because the glue was too fast.
I use this glue when I need to glue something and have it attached immediately with little to no drying time. Small items like antennae are perfect examples.
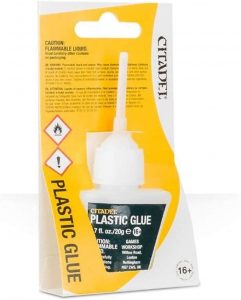
Plastic melting glue is one of the most common types and is used in miniatures as well as plastic models of all types and sizes. It was what you used fifty years ago with your Revelle models, it is what is recommended by Games Workshop with their own Citadel Plastic Glue, and is the standard for plastic modeling giants like Model Master, Tamiya, and Testors.
These glues literally melt the plastic together, but that takes a little while so you have time to adjust. It also allows you time to take the item back apart if you are fast enough. The downside to this glue is that it can take a few minutes to really stick together. Since it melts the plastic together, care must be used in its application or you might melt details off of your miniature. The rule of thumb, really with any glue but particularly this one, is to use it sparingly.
I use this type of glue as my primary glue type unless I have a specific reason for using a different glue.
Lastly, we have what I call regular glue. This is pretty much any glue that doesn’t fit in either of the two previous categories. My favorite is E6000 and I use it for just about everything in the world when I don’t need instant drying or plastic melting attributes. No, I really do. I use it for attaching little decorations to bases (grass, bushes, rocks, skulls, whatever) all the way to repairing the convertible top on my wife’s MINI Cooper. It is absolutely fantastic stuff, but be sure to use it in a very well-ventilated area.
The other type of regular glue I use is standard Elmer’s white glue, not to be confused with school glue. I use this to paint onto the bases with an old paint brush I don’t care about when I want to sprinkle some form of base covering on the base.
Paintbrushes
This is a pretty personal decision, but there are some factors to keep in mind when you pick out your paintbrushes.
Most people look at the size of the brush tip and see if the bristles are suitable for the type of paint they will be using then call it a day. If only things were that simple, spoiler alert, they are not.
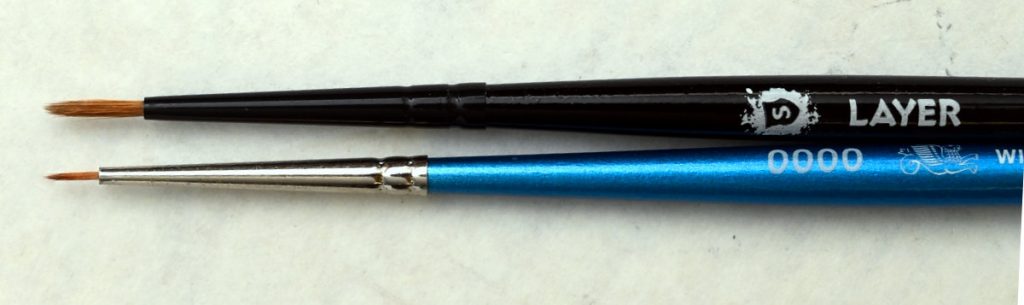
The first thing that really got me was the length of the bristles. Note in the image above two brushes with very fine tips, both excellent quality, and both made for water-based paints (the Citadel paints for Warhammer are water-based). You might think that using the one with the shorter bristles would give you more control over where to put the paint, and to some degree that might be a little true, but there is a tradeoff.
Shorter bristles mean the brush can hold less paint, and that means you are loading it with paint more often. Not a huge deal, but still a pain. Where things get really interesting is that shorter bristles also mean it is much more likely the paint will get up into the ferrule. When this happens it is very unlikely you will get all of it out, and when it dries it will cause the bristles to spread apart and the tip of the brush to lose the sharp point on the tip and this makes it useless for painting small things.
You may look online and see a lot of videos and articles telling you how you can clean your paintbrush and restore it even after having paint dry up in the ferrule. If you look closely at these sources you might notice that the vast majority are working with much larger brushes than you will use with miniatures. The same techniques do not seem to work nearly as well for the very small brushes you use in this hobby and even if they did, I will only spend so much time trying to fix a $10 paint brush before my time outweighs the expense of just buying a new brush.
Long story short, get a brush meant for what you are doing. The Citadel brushes are very nice, as are Vallejo and The Army Painter. You can also get brushes from companies like Testors and Tamiya but I don’t recommend starting there for miniatures. Whatever you do, stay away from cheap brushes. They will do nothing but frustrate you. If you buy nice brushes and take care of them, they will do a great job for a long time.
In closing
You are now pretty well equipped and ready to start your adventure in miniature painting. Only time and experience will tell you where to go from here as a lot of it depends on how you work, what paints you eventually decide on, and how well certain tools work for you.
The best advice I can leave you with is to buy quality tools and supplies as this will make the hobby easier and more enjoyable, as well as typically be a better value in the long run. Fortunately, the difference between quality tools and supplies for this hobby and cheaper versions is usually just a few dollars.